- Introduction
- What's New?
- Features
- Upgrading the Design Editor
- Breaking Changes in 6.0
- Getting Started
- Integration with E-commerce
- Integration with Remote Asset Sources
- Printable Files and Proof Images
- Configuring Products
- Creating Product Templates
- Creating and Editing Templates in Customer's Canvas
- Elements for Creating Designs in Customer's Canvas
- Supported Markers
- Setting Markers Outside of Templates
- Defining Marker Shortcuts
- Text Elements in Customer's Canvas
- Image Placeholders
- Specifying the Image Source Folder
- Stroke and Shadow Effects in Customer's Canvas
- In-String Placeholders and Text Validation
- Text Wrapping in Customer's Canvas
- Barcode Placeholders
- Copyfitting
- Restricting Editing Designs to Certain Regions
- Product Themes
- Product Layouts
- Group Elements in Customer's Canvas
- Photoshop Templates
- Overview of Creating Templates in Photoshop
- Non-rectangular Image Placeholders
- Using Smart Objects in PSD Templates
- Placeholders with Frames
- Point and Paragraph Text
- Stroke and Shadow Text Effects
- Curved Text
- Multi-Column Text
- Typographic Designs
- Setting up Fields with Predefined Values
- Text Wrapping
- 3D Preview Mockups
- Sample PSD Files
- InDesign Templates
- User Interface
- Configuration Files
- APIs
- Add-ons
- System Requirements
- Troubleshooting
- Migrating Your Applications
- Licensing
- Copyright Notices
Using Smart Objects in PSD Templates
Applies to: Customer's Canvas On-Premises; Design Editor 6.15.0, 6.x (may differ) · Archived documentation
When adding images to a template, you may want to apply transformations onto them, for example, a rotation. Photoshop allows for rotating images, but if you load such a template and replace this image, the rotation won't be applied to the new image.
To solve this problem, you should separate the image from the transform itself. Fortunately, Photoshop offers a built-in mechanism to do this, namely, smart objects.
Smart Objects
The smart object is a powerful tool in Adobe Photoshop, representing containers for raster/vector image data and applying geometrical transforms on them. The most important aspect is that transformations and image data are kept separately, so you can change transforms and images independently. For example, if we replace a raster image inside a smart object, the new image is transformed the same way as the original one. The following features associated with smart objects are significant for Customer's Canvas:
- Applying geometrical transforms (rotate, scale, warp, etc.) to a raster/vector image leaves the image data unchanged. Thus, it allows applying geometrical transforms and tone corrections separately.
- Sharing a source. It allows the user to create several smart objects referencing the same image, and when you replace it, all smart objects are updated at once.
Only scale, translate, and rotate transforms are supported in Customer's Canvas. They are applied to image layers and image placeholders. Thus, the user can edit them in the editor after the template loads. In this case, transforms made by the end-user on the canvas combine with the original ones loaded from the smart object. For example, if an image layer is rotated at 90 degrees in a template, the user can rotate it back to 0 degrees.
Unsupported transforms (all transforms except scale, translate, and rotate) are not applied to uploaded images in the Customer's Canvas editor. In other words, the image presented in a PSD template is transformed, but as soon as you replace an image in a placeholder, the transform is discarded.
When you add PDF files to PSD templates, set the Crop option to Media Box.
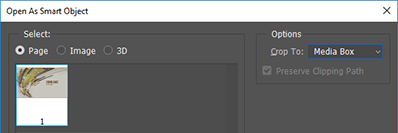
Adding Smart Objects to PSD Templates
Here is the easiest way to create a smart object in a PSD template which will apply rotation on an image:
- Open a PSD template.
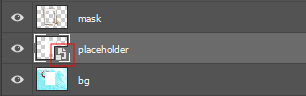
- Right-click on an image layer in the Layers list. On the context menu, click Convert to Smart Object.
- Now the layer is marked with the smart object icon:
- Transform the layer through Edit > Transform > Rotate.
- Save the PSD template.
Also, there are a few alternative ways to add smart objects. Customer's Canvas recognizes such smart objects as well. For example:
- On the Main menu, click File, and then click Place Embedded to insert a smart object into a loaded PSD template, or click Open As Smart Object to load a smart object as a new PSD file.
- On the Layer menu, point to Smart Object, and then click Convert to Smart Object in order to convert a layer to a smart object.
Opening Smart Objects in Customer's Canvas
Now, let us try to open our PSD template with a smart object in the Customer's Canvas editor. You will see that the image is rotated and if you upload another image there, it is still rotated.
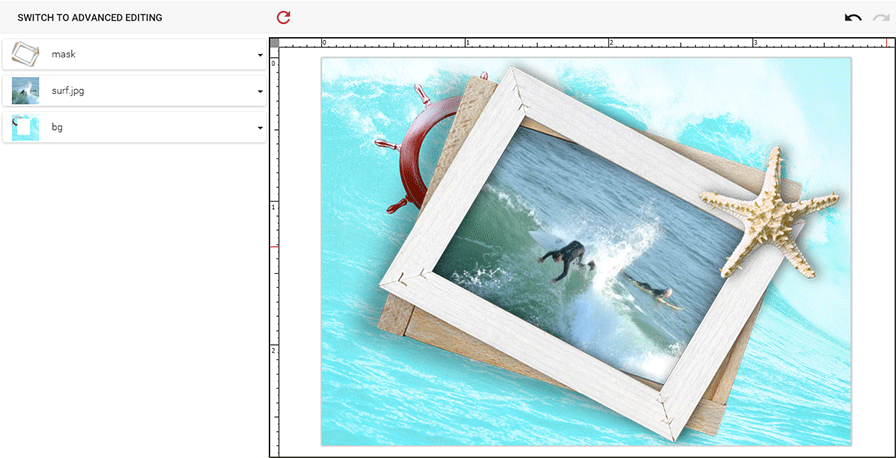
You will get the same behavior not only for regular image objects but for image placeholders as well.