In our increasingly digitized world, there is still a place for business collateral. Many professionals still rely on these printed materials for brand recognition, advertising, and contact information. That’s why companies from a wide variety of industries still reliably order business cards.
These requests may differ significantly. A real estate agent might want a standard design with a traditional rectangular shape, while a pastry chef prefers a card with rounded edges printed on craft paper. All businesses want to stand out and leave a lasting impression with their pocket-sized cards. You should develop a clear understanding of what your customers want to see and what opportunities you can provide when you plan your editor integration. It can be tricky for first-timers to define what the editor should include, how to set up web-to-print templates correctly, whether or not your clients require an online preview, and many other details.
That’s why we wanted to create this comprehensive resource that you can refer to while you plan your business card editor integration.
Collect all the requirements
Modern technologies empower us to create and print business cards of virtually any type, shape, and color. Customers can put almost anything they can imagine on paper. You should carefully define the requirements for the business card design software to accommodate this increasing desire for customization and build a properly working web-to-print solution.
Define the size of your business cards
Consider if you prefer an editor limited to the typical 3.5” x 2” business card or if you’d like to allow your customers to create personalized 2.5” x 2.5” square business cards. Another requirement to keep in mind is whether your customers can edit both sides of the card or only one. With Customer’s Canvas, you have the freedom to build editors for any business card, including both standard and custom sizes.
Provide information about the printing method and type of material
When customers place an order for personalized business cards, your work begins. The web-to-print system will send you a print-ready output file - usually as a PDF file - to fulfill the order. The type of output will depend on the printing method as well as your equipment.
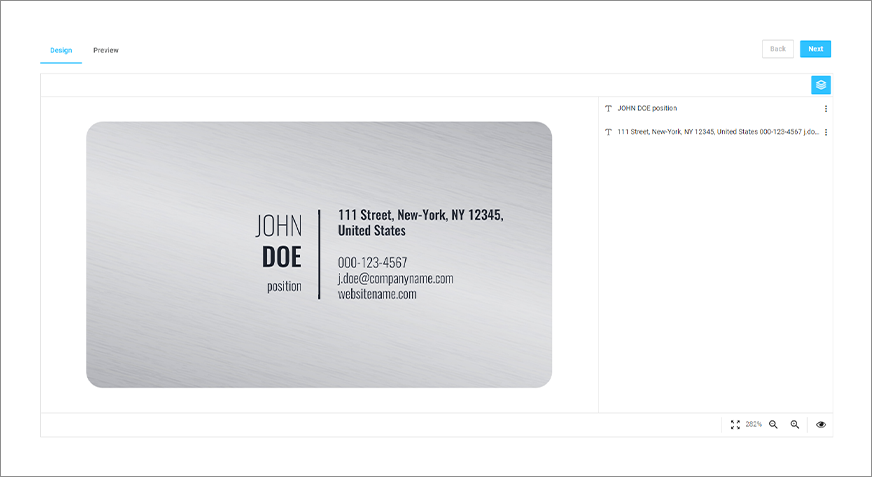
What materials will you use in the printing process? There are many options beyond traditional paper substrates, like wood, metal, plastic, and even sponges. Customers like to visualize these unique materials to see how their finished cards will look. For example, if you make metal cards, then you can create a mockup that displays a metal surface in the design editor.
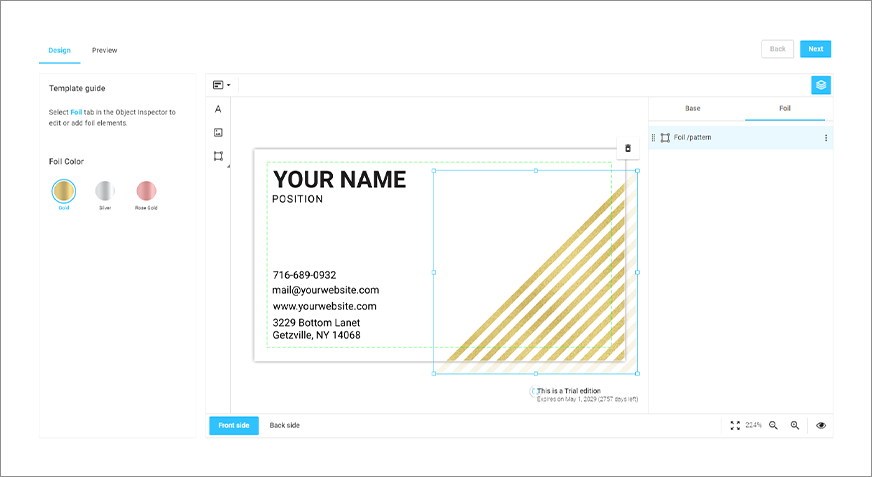
Consider special finishing options
Business cards aren’t just pocket-sized billboards with contact information - they’re also marketing tools. Your customers will likely want to apply a flashy finishing technique to stand out from their competitors.
Customer’s Canvas makes designing products with finishing techniques like foiling, UV-coating, embossing/debossing just as easy as creating a simple printed design. Your customers can add finishing elements with the same intuitive WYSIWYG interface that they use to manipulate printed design elements. End-users can apply a finishing technique to any part of their design, including text, vector objects, logos, and even photos.
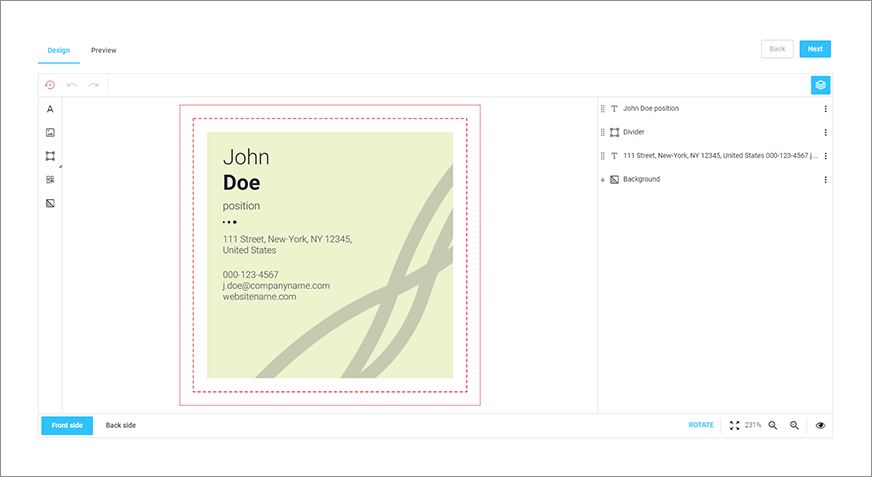
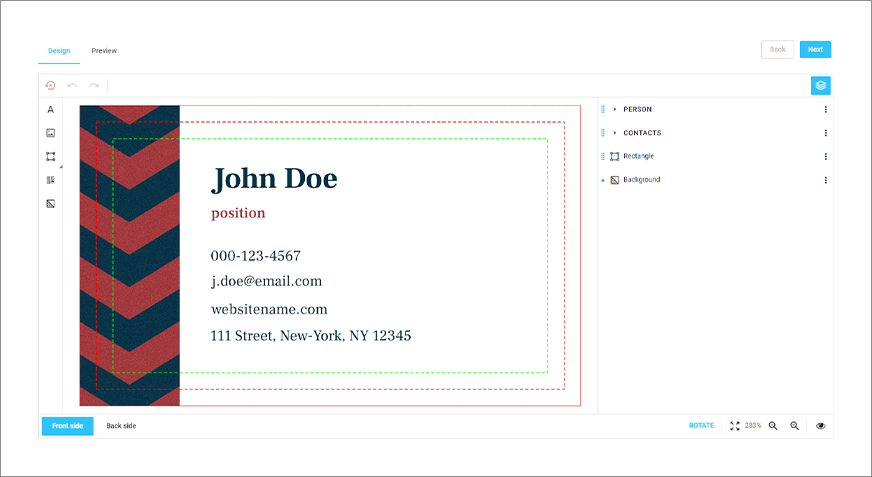
Give your customers a hand with predesigned templates
A blank canvas might look intimidating to your customers. To avoid scaring them away before they even get started, prepare a library of professional-looking business card templates for different use cases. You can divide these templates into different styles and groups, for example, specialized templates for companies working in real estate, cleaning services, healthcare, and other industries. Grouping templates can increase orders because it makes it easier for customers to find the templates best suited for their goals. Template libraries are great alternatives for businesses that can’t afford to pay for professional design services.
Don’t forget to follow the appropriate guidelines for your design templates.
Technical requirements:
- 300 DPI resolution: this is the correct DPI for printing if you want to provide customers with the best quality printed products.
- You can create templates in Adobe software or use our Template editor.
- Double-check that you are working with the correct sizes for your business cards.
- Placeholder images and other included assets must be linked to the document and included in a separate folder.
Clearly indicated printer’s marks:
- Bleed zones: the recommended bleed for a standard business card for all sides is .125”.
- Safety margins: the standard margin for a business card is .125” to .25”.
We recommend that you stick to these basic guidelines. You can read more information about creating web-to-print templates in our up-to-date documentation. Feel free to also check out our white paper on using templates in web-to-print.
Visualize business card attributes
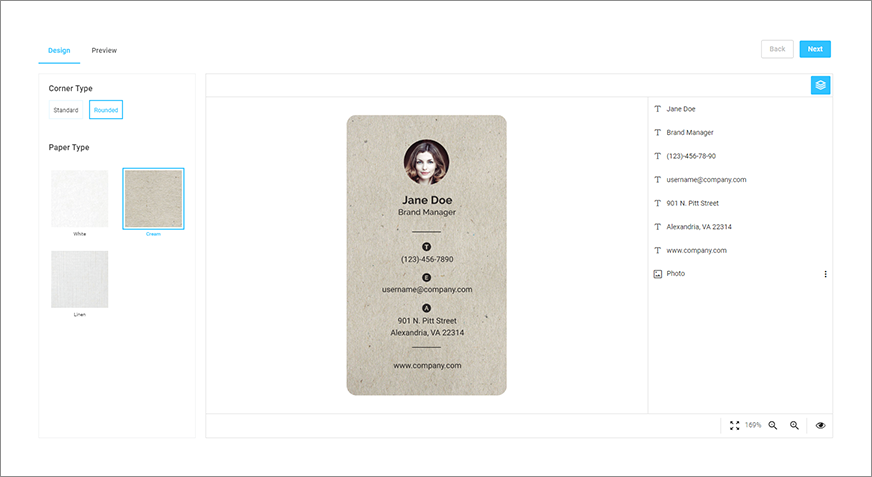
Allowing customers to visualize attributes plays an important role in simplifying the editing process. It gives them a better understanding of how their final product will appear.
For example, you can display the features and texture of the substrate material (craft paper, plastic, metal, etc.) without creating several different templates. In this scenario, we create mockups and add different textures to the same template. We use these textures for display purposes only; they will not go to print.
You can also display the final shape of business cards, such as traditional rectangular corners vs. rounded corners. The JPEG format does not support transparency, so you should create mockups in the PNG, PSD, or SVG formats.
Check out our documentation to learn more.
Provide end-users with an easy way to complete custom orders
Different editors are suitable for different personalization scenarios. For example, template-based editors allow customers to edit predesigned templates. You can set up template restrictions, which are useful for editing business card designs where the logo and company name should not be changed.
WYSIWYG editors suit users with stronger design skills. A freehand editor gives the client total freedom during the design process. Users can add text elements, images, backgrounds, and artwork to a blank canvas. Form-based editors are better for beginners because they only need to insert information into a web form to personalize their products. These users can only edit pre-set elements and cannot interactively change the design by choosing and manipulating objects.
These types of editors are described in more detail in a special blog post.
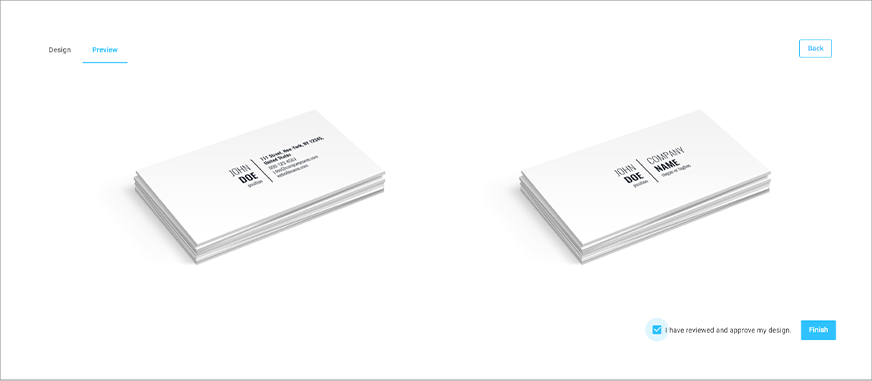
Show business card previews to increase conversions
After selecting the necessary personalization options and preparing the product design, end-users may want to see the final design presented on a physical object, like a table or desk. The preview option allows customers to see the final design without safety lines. Customers can check the final design for misprints and errors before clicking the Order button.
Start receiving online orders for custom business cards
Each business card editor is unique in form and purpose. Some boxed solutions won’t fully meet all of your unique requirements. It’s important to find an editor that supports a wide set of customizable features.
Customer’s Canvas is a flexible tool that you can customize to suit your needs, the requirements of your equipment, and the demands of your customers. If you’re ready to start receiving online orders for custom business cards, we are here to help!